J G 927 Posted September 24, 2014 Report Share Posted September 24, 2014 I have just got hold of a couple of 7" VGA monitors, great for a glass cockpit. Problem is mounting them so that they are near enough to see and to fit in with all the other stuff I have. There is only one thing for it, I will have to build a proper cockpit. I don't intend to replicate an existing fighter, bomber or anything else for that matter, but intend to build a single seat fighter style cockpit around the Saitek instruments and the two small monitors I have. The plan is to have a small MDF based panel that mounts the three Saitek large panels and two Saitek instruments that I have as well as the two 7"screens. added to these will be some bespoke panels on the RHS while the LHS will have throttles and leavers. I plan to get the Thrustmaster warthog Joystick and throttles and will sell off my Saitek Yoke and its throttle quadrant. Currently I have a second stand alone Saitek throttle quadrant which I will use for various things such as Mixture, prop pitch, Harrier nozzle settings and other bespoke items. In the mix somewhere will be two small footprint keyboards and track balls for the two PCs I use. I will try to post pictures here as I go. Link to post Share on other sites
needles 1,010 Posted September 24, 2014 Report Share Posted September 24, 2014 Hey John, good for you mate. But beware, it's a drug and a very addictive drug at that. Check out the cockpit building forums, you should find plenty to keep you busy. Also check out Mycockpit.org there's some good advice there also. Looking forward to your pics. Link to post Share on other sites
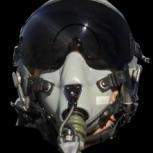
brett 2,283 Posted September 24, 2014 Report Share Posted September 24, 2014 Sounds like a fun project, looking forward to your progress. Don't forget the leather flying helmet and goggles. Link to post Share on other sites
jaydor 345 Posted September 30, 2014 Report Share Posted September 30, 2014 Sounds like a fun project, looking forward to your progress. Don't forget the leather flying helmet and goggles. And a bottle to pee in.. 1 Link to post Share on other sites
J G 927 Posted October 21, 2014 Author Report Share Posted October 21, 2014 Below are some photos of the build:- My initial idea was to have an arch for my legs as you can see cut out below:- However I soon realized that this configuration would not be large enough to accommodate all of my panels. So I had to replace the cutout section as can be seen above. Panel holes all cutout. I had to use some flat metal bars to reinforce some of the weaker parts of the frame. Another view above of the cutout panels stage. Next I painted the whole thing black. Here we see the dashboard with all the panels in place. All of the Saitek panels are up and working as are the two six inch screens. The arduino board powered switches, knobs, LED warning lights and Green back lit LCD screens have yet to be wired and programmed. The keypad under the dummy sight is FSUIPC controlled. Below is the rudder bar frame and joystick/yoke mount. this is made from cheap chrome pipe and some clamps I picked up for a fiver on Ebay. To the right hand side of my seat I have a couple of monitors. One for each of the two PCs in my rig. These screens are used to control the FS displays and for Skype for online play etc. The next major part of the build is to build the left hand panel. This will be stow-able by sliding ti under the desk when not in use. This panel will support my throttles and more switches etc. My intention at this time is to have my yolk and joystick interchangeable so that I can suit all types of aircraft. I will use my X55 throttles with all aircraft, but will have a Saitek 3 leaver throttle quadrant behind the throttle unit for mixture, prop pitch and air-brakes/spoilers. Watch this space for more developments. J. Link to post Share on other sites
needles 1,010 Posted October 21, 2014 Report Share Posted October 21, 2014 Superb John. I like the style of your panel. Very fast jet. Well done buddy. Link to post Share on other sites
hifly 925 Posted October 21, 2014 Report Share Posted October 21, 2014 Good work John, engineer, chippie. Is there no end to your talents? Link to post Share on other sites
Martin B 4 Posted October 22, 2014 Report Share Posted October 22, 2014 Hi John Great Job Link to post Share on other sites
brett 2,283 Posted October 22, 2014 Report Share Posted October 22, 2014 Nice work JG, you should feel right at home now. John's new joystick Link to post Share on other sites
MyPC8MyBrain 273 Posted October 22, 2014 Report Share Posted October 22, 2014 i didnt expect that; NICE work JG! Link to post Share on other sites
J G 927 Posted October 22, 2014 Author Report Share Posted October 22, 2014 @ Brett Have I got that long to wait ?!!!!! Well thanks for that buddy, for now I have something to depress me.... but later..... Its going to be sooo exciting!!!! Link to post Share on other sites
J G 927 Posted November 14, 2014 Author Report Share Posted November 14, 2014 The side panel is well under way now... Above is the first part of the framework. Now added is the sloping switch panel section. Starting to box in. The side shown will be removable to allow access to wiring et. and the small internal shelf will be for the electronics to run the switch panel, and for a powered USB hub. Above you can see 4 holes. In the foreground there is whole for a Saitek throttle quadrant for mixture, prop pitch and, if I can get it to work spoilers. Above that is a void to house my Christmas present, namely a Saitek HOTAS throttle, and finaly two voids to take two banks of switches. First coat of paint done. Next I will sand and repeat the paint, and a third time if needed. Once this section is done then I will, at last, be in the air again. Then there is the RHS panel to do. This will be slightly different. It will have a section the same height and length as the LHS panel, but will also have a parallel section built higher for two screens to be placed on. The lower section will have two keyboards and trackballs for basic computer control. There will be a sloping section similar to the RHS switch bank, but more steep and therefore not as long. In this I intend to place some dummy instruments. I have two small volt meters and I am currently constructing a sweeping dummy radar screen. More soon. 1 Link to post Share on other sites
hifly 925 Posted November 14, 2014 Report Share Posted November 14, 2014 Good progress JG. Link to post Share on other sites
needles 1,010 Posted November 14, 2014 Report Share Posted November 14, 2014 Looking good John. I didn't notice any ejector mechanism on your chair? I expect that's coming later hey? Looking forward to more. I must admit it's getting my creative juices flowing again. But I don't know what wifey will say if I get any bigger. I'd love to build an enclosed cabin for my panel though. More creeping to wifey methinks. Link to post Share on other sites
J G 927 Posted November 14, 2014 Author Report Share Posted November 14, 2014 Fat chance of an enclosed cockpit, I would love one too, but I have a feeling my wife would lock me in it and chuck away the key! Link to post Share on other sites
needles 1,010 Posted November 14, 2014 Report Share Posted November 14, 2014 That's ok, you can fly away. Link to post Share on other sites
brett 2,283 Posted November 15, 2014 Report Share Posted November 15, 2014 You are quite the craftsman JG, looks fantastic. Link to post Share on other sites
J G 927 Posted November 15, 2014 Author Report Share Posted November 15, 2014 Looking good John. I didn't notice any ejector mechanism on your chair Blast, why did you have say that! This was to be a three stage project, now it has to be four stages. Link to post Share on other sites
J G 927 Posted November 15, 2014 Author Report Share Posted November 15, 2014 I have had a bit of a think about an ejection seat. Buy a real one and it will cost about 7 or 8 thousand pounds. So that's not on. This set me thinking about making my own one..... And I think I have hit on a way to do it out of drain pipe, wood and foam pillow. It might come to naught, but I think it will work. So stage 3 will no longer be the RHS panel, but will be the Ejector seat Once I have got as far as proving the concept I will post pictures here. Link to post Share on other sites
needles 1,010 Posted November 15, 2014 Report Share Posted November 15, 2014 I'm now intrigued J G. Looking forward to your idea and subsequent pics. Link to post Share on other sites
hifly 925 Posted November 15, 2014 Report Share Posted November 15, 2014 I already have an ejector seat. It's a Mk 1 Kate, she kicks me out of the cockpit when there is serious ebay business to be done. 2 Link to post Share on other sites
J G 927 Posted November 15, 2014 Author Report Share Posted November 15, 2014 I already have an ejector seat. It's a Mk 1 Kate, she kicks me out of the cockpit when there is serious ebay business to be done. I have one of that style as well, however not any good for FS, Mine is a Mk1 Lizzie, this mark of ejector makes you feel very uncomfortable if you spend too much time at a computer, and if you seriously overstay on a PC the rocket under your arse is likely to go off. 2 Link to post Share on other sites
J G 927 Posted November 26, 2014 Author Report Share Posted November 26, 2014 Some progress with the cockpit... The wiring in the side panel into an Arduino board Completed Side Panel. It still needs some programming and testing. I broke my FS chair, so as a break from the wiring I have started my new seat. What you see here is a proof of concept. And yes the structure takes my weight. When fully built, what you see here will be hidden under wood, which will strengthen it further. Link to post Share on other sites
mutley 4,487 Posted November 26, 2014 Report Share Posted November 26, 2014 Thanks for the update JG, I can see why you have been grounded for so long! Link to post Share on other sites
hifly 925 Posted November 26, 2014 Report Share Posted November 26, 2014 Good work John, love the ingenious chair, electrician, plumber there's no end to your skills. Link to post Share on other sites
Recommended Posts
Please sign in to comment
You will be able to leave a comment after signing in
Sign In Now