For all Saitek compatible simulators, developed by Wheel Stand Pro.
Reviewed by Joe Lawford
April 2014
Background
The Wheel Stand Pro series of products are fabricated in Poland
by a group of sim enthusiasts who also happen to work for a
company which recovers industrial parts from old machines. With
their expertise at metal work combined with a flair for seeing a
gap in the market, this led them to start manufacturing the
Wheel Stand for Logitech racing wheels and pedals. They then
adapted the racing Wheel Stand for other manufacturers such as
Microsoft, Thrustmaster, Porsche, and Madcatz.
 Saitek Flight Yoke System |
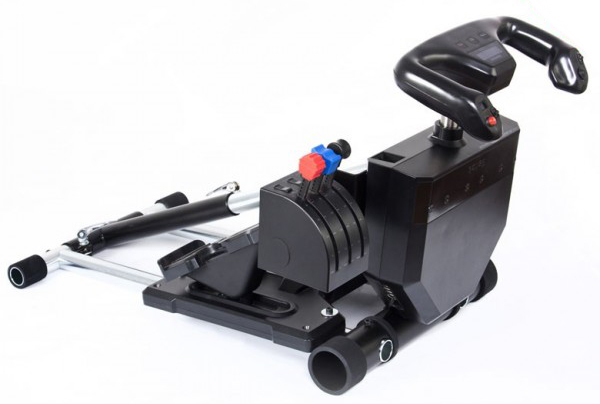 Saitek Flight Yoke System (Folded) |
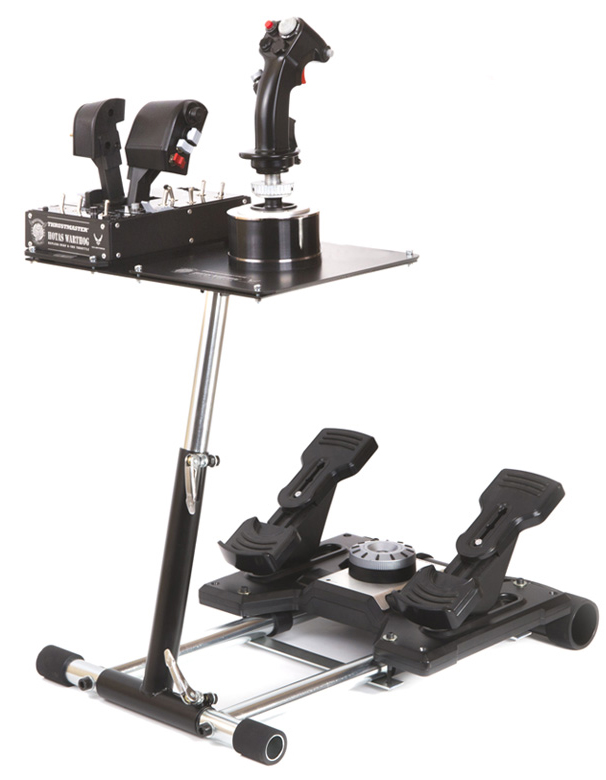 Thrustmaster HOTAS Warthog System |
Now their products have naturally evolved to work with flight simulation products such as yoke, rudder, switch pedals, and throttle quadrants. Presently, they manufacture a stand designed for the Thrustmaster HOTAS Warthog (on pre-delivery) and a stand to fit Saitek Pro Flight Yoke System, which I am reviewing today.
Features
Here are the publicised features of the WSP from the manufacturer:
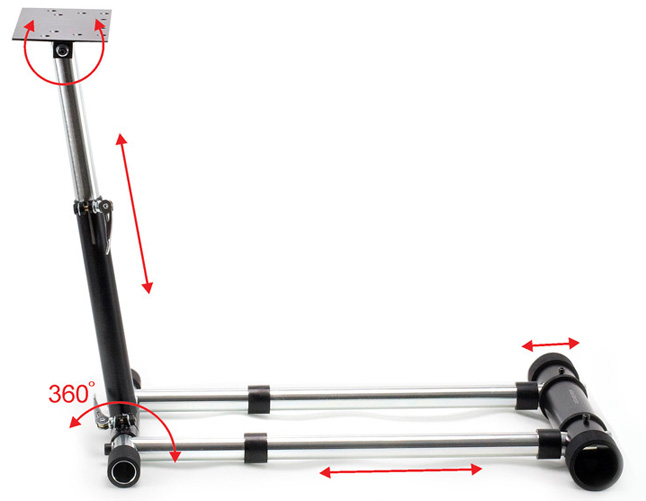
● Tilt of the steering wheel column 360° stepless adjustable;
● Quick release mechanism for rapid adjustment;
● Specially designed to support Saitek Pro Flight Yoke System with throttle quadrant, trim wheel, and panels;
● Additional plates to fix gear shifter/throttle quadrant/trim wheel/panels on either side of the volant;
● Adjustable for all sizes of players and for every chair and sofa;
● Ready to work out of the box;
● Handcrafted full metal construction for life-time durability and stability;
● High quality anti-sliding rubber feet prevent floor damage;
● Precision build for maximum rigidity and stability;
● Easy upgrade for other wheels; and
● Genuine European quality in design, material, and craftsmanship.
Delivery
I received my WSP for Saitek only a couple of days after ordering and it arrived by courier having been sent from Poland by Air Mail, I was amazed how quickly it arrived, thinking it would come overland.
The delivery is free, and must cost a lot of money to send as it is no lightweight object being 30.6 lb (13.88Kg) when assembled with instruments.
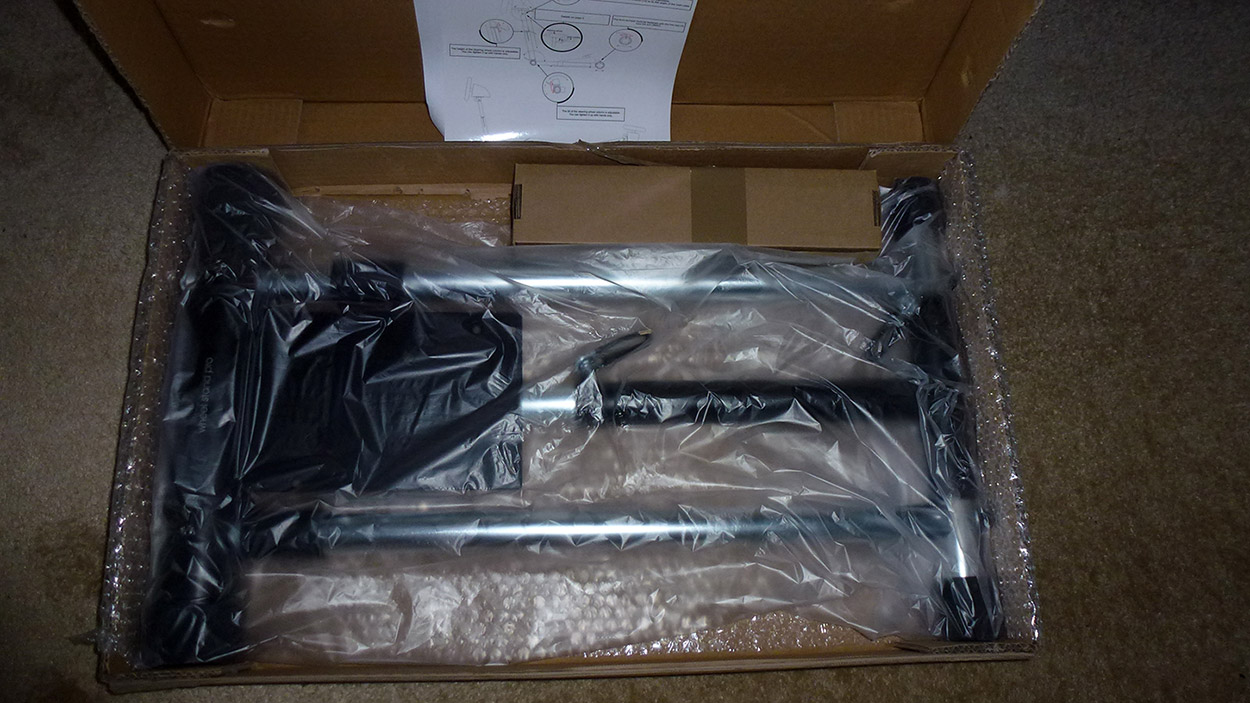
WSP main frame is fully assembled.
Documentation
Included in the box is a single sheet, 4 step instruction leaflet. This gives just about enough information to build the stand, more detail later.
The leaflet also refers to an online video which wasn’t live at the time I was building the stand but it is now. My recommendation is to watch the video below before attempting to start assembly as it is much easier to understand.
Ease of Construction
The main frame of the stand comes fully assembled, so the only input required from me was to screw on a few brackets and attach the instruments, yoke, and pedals.
The instruction leaflet also gives a parts list, this must be checked as I found I was missing 6 M4 Screws and 2 M4 nuts, there was no quibble from WSP and they just sent them through by mail. Included with the parts is a 13mm ring spanner and 2 Allen keys, along with the brackets screws and cable ties. All I needed was a Philips head screwdriver.

Unboxed, time to check those parts.
It probably took me about 30 minutes in all to assemble the WSP, including head scratching and looking for those M4 nuts.
A competent installer could build the item in less than 15 minutes, look at the following video on how easy it could be.

The WSP is designed for Saitek’s Pro Flight rudder pedals, I own the Cessna Pro Flight rudder pedals (see picture above) which, because it has foot rest extensions, stops you from using one of the pedal mounting flat plates. This is not a criticism of the frame, I just didn't have the recommended pedals. Modifying the way the pedals sat on the frame didn’t affect the performance at all as one of the mounting plates is enough to secure it. Even though the foot plates do look rather odd perched on the frame, because of their rugged construction, they perform perfectly.
Making use of the USB hub. Also, note footrests balanced on the frame.
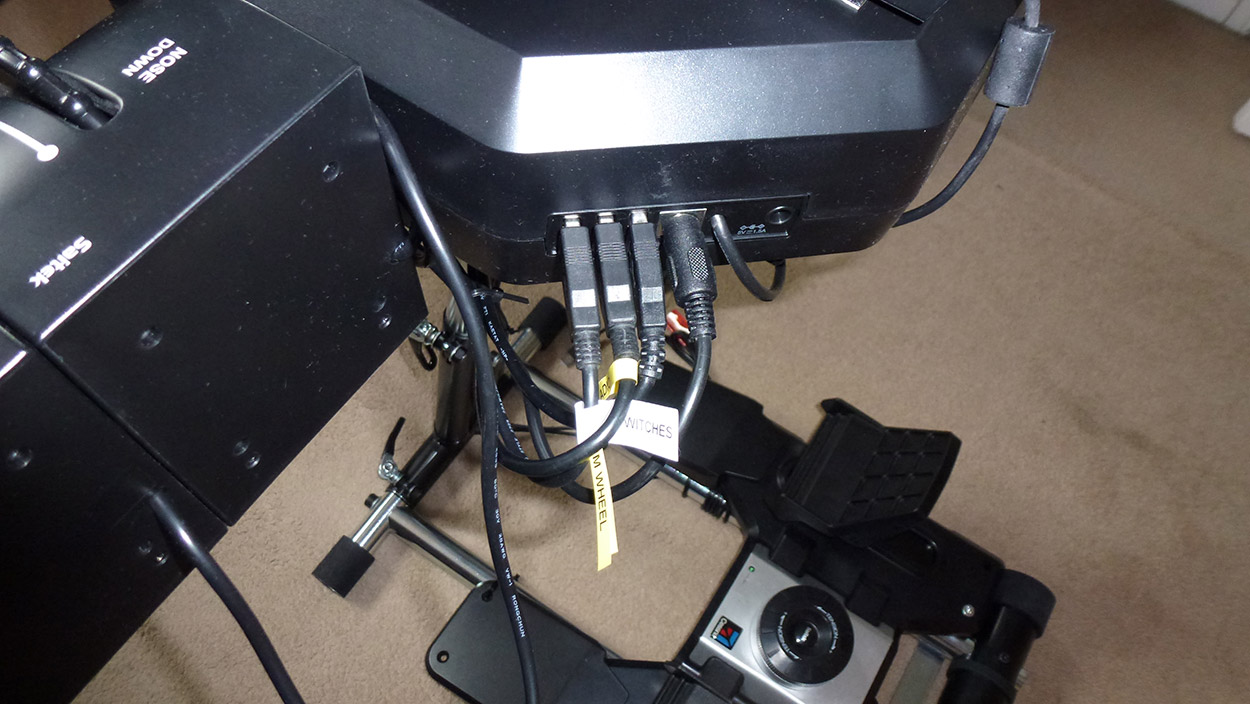
The Saitek yoke has a USB hub built in that takes 3 USB devices plus the quadrant which has its own proprietary plug that also plugs into the yoke. This makes the routing of the one cable (two in my case) from the yoke, down the yoke column a simple and neat task. WSP also provide 2 cable ties but I found myself using a whole lot more from my own collection just to really give it a tight and neat look.

Only 3 USB leads from 7 devices
Stand Options
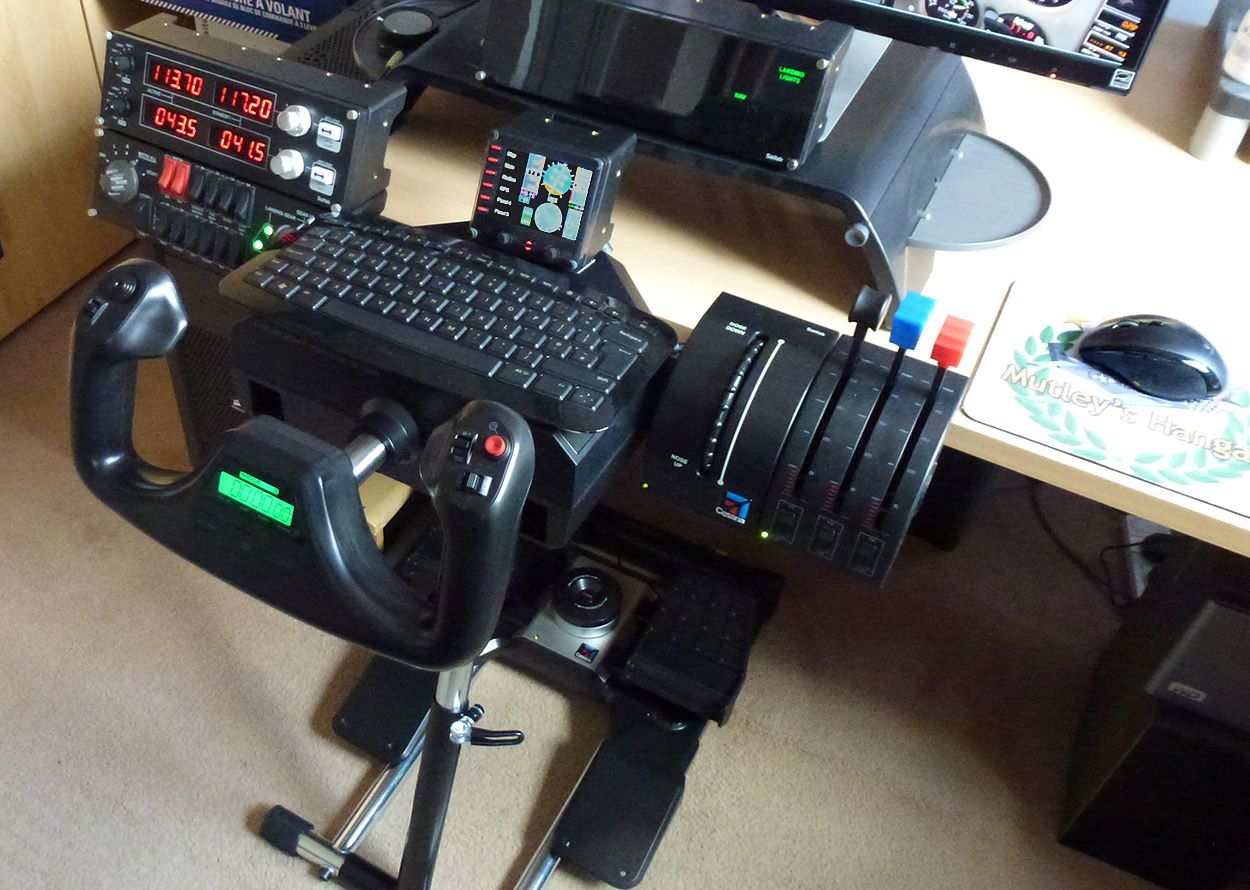
Attached to the yoke plate are two identical black bars. These bars are pre-drilled to allow instrument panels or 2 items such as quadrant and trim wheel which are the same width. This gives you the choice of your favourite configuration. I have the switch panel and radio combination. The bracket would be sturdy enough for a third panel but may look a little ungainly and would require another wire to be strapped to the upright column.
For the future, it would be nice to able to buy brackets to suit other Saitek items like the TPM or to allow for the Cessna Pro Flight pedals.
Build Quality
From the first opening of the box to inspect its contents to screwing the panels in place, one highly apparent feature is the fantastic build quality. The chrome frame is thick, sturdy and very shiny. The black parts of the frame are coated or treated and have a perfect finish, even the screws, washers, nuts, brackets and spanner are top quality, you can just tell, it feels right as well as looking right. This is no cheap import from the PRC.
Everything fits together perfectly and operates perfectly, however, you have to be on your guard when loosening the quick release nuts as the weight of the column and instruments will have it clattering to the floor with your pinkies pinched in the process - that never happened to me, honest!
Convenience
I am one of flight sim’s poorer cousins who doesn't have enough space for a permanent full size panel, or even a permanent space for my controls. I have to share my work desk with my regular work of review writing and running the Hangar. So when it came to fly, if I could be bothered, I would set the yoke up and the quadrant and trim and all the associated bits and pieces on each and every occasion. By the time it was set up, sometimes I had run out of time or lost the urge to go flying!
With the WSP, all I have to do now is extend the yoke column and plug in 3 USB’s (only 2 required on the standard installation) fire up FSX and we're ready to go. When not in use, it stands folded up on its end well out of the way. Even the wife approves!
 Folded - Front View |
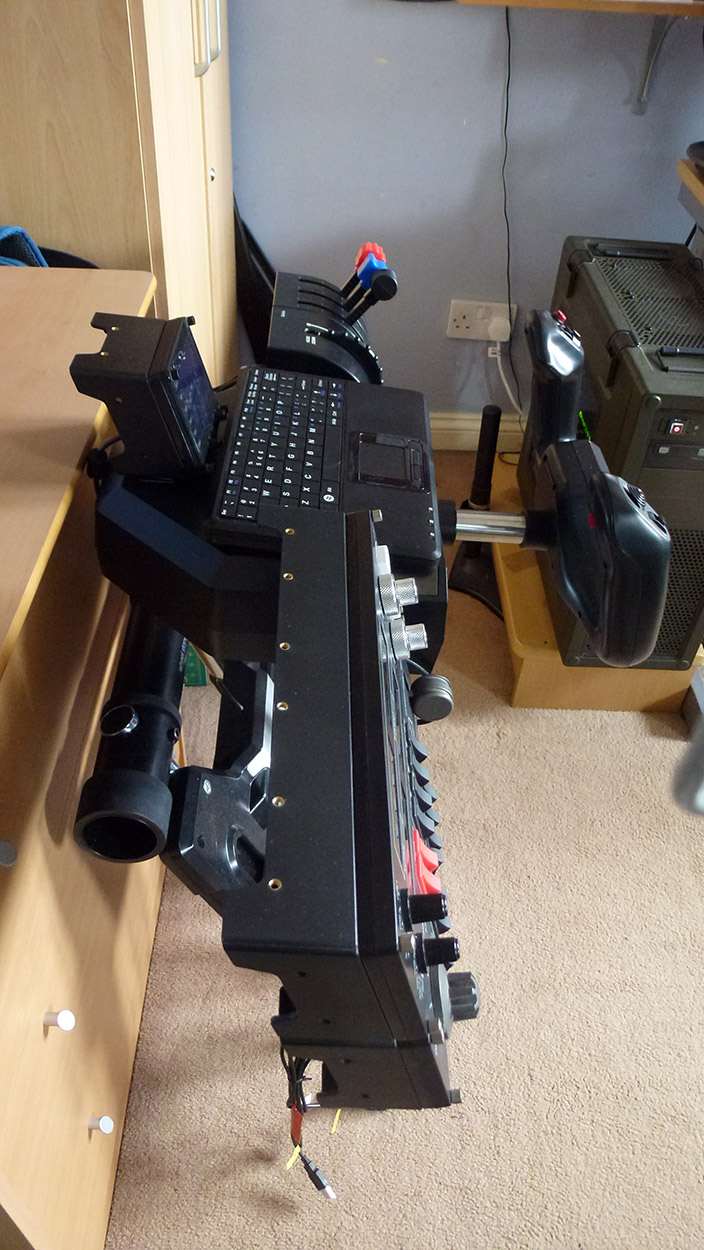 Folded - Side on View |
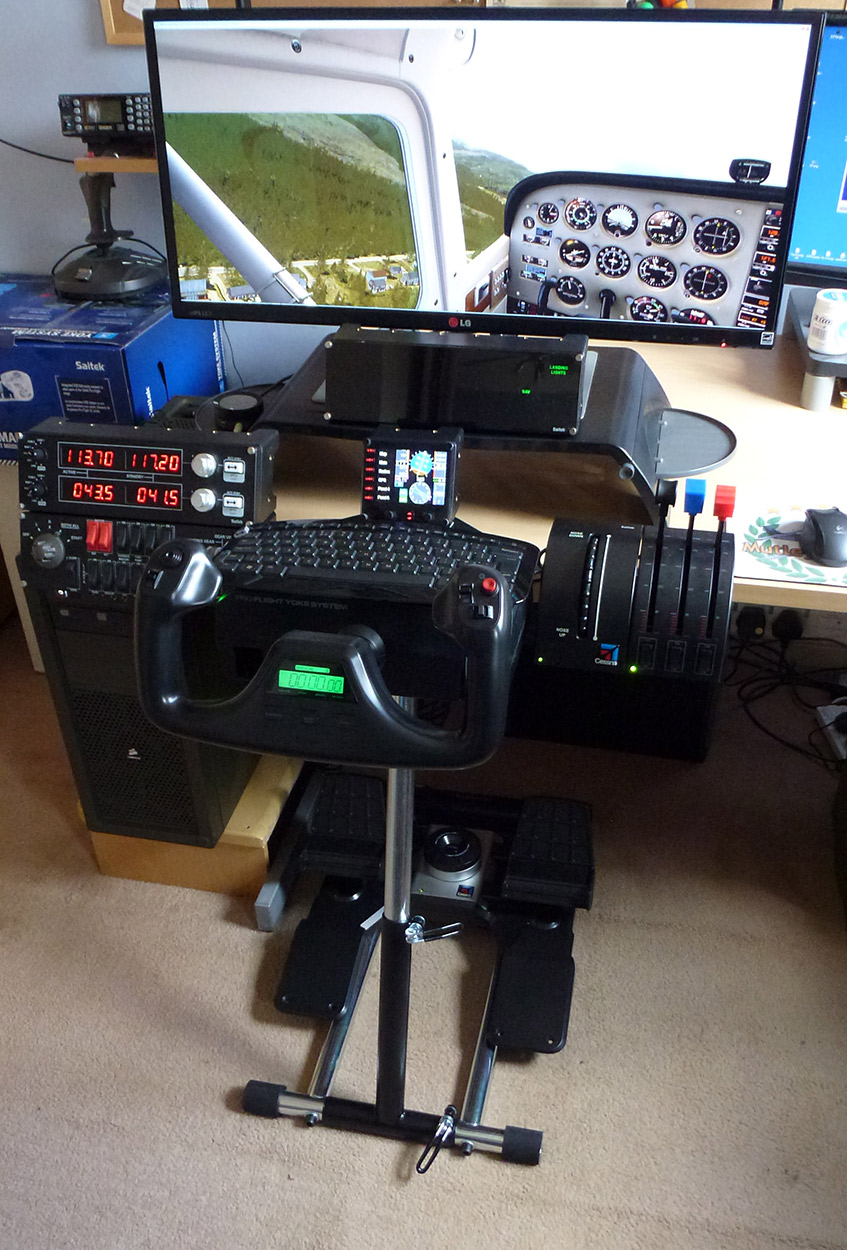 In Use |
 In Use 2 |
 In use 3 With Added Keyboard and FIP |
|
I found it quite easy to get the stand setup the way I like it, not only does the yoke column move ‘steplessly’ in an arc towards and away from you, the yoke plate itself can be adjusted for pitch with a spanner. This is where it scores points for comfort with me. The standard yoke setup is to screw it onto a flat level surface such as your desk. This means the yoke only operates on a fixed plane. With my setup I have the yoke plate tilted up at the front which makes for a more natural movement from your arms and elbows.
Expandability
Sometimes I use the TPM controller, but the layout of the bracket does not specifically cater for it. However, you could fit it in place of the throttle quadrant and trim if you wanted to but it just wouldn't look and perform right.
Fortunately, the top of the yoke is crying out to have something attached, I chose my FIP panel and a small wireless keyboard I use. This meant an extra USB cable down the yoke column but it isn’t really noticeable with some neat cable tie work. This really was the icing on the cake and ensured the WSP will get a lot of use from me.
Value for Money
Presently, the price quoted on their web site is €139, £117, $177 AUD209. This includes delivery by DHL or EMS to China. The item has a 2 year return to base warranty and a 7 day return policy excluding the cost of return postage.
As the saying goes, 'You only get what you pay for" (referring to quality) and in this case you are getting a quality product. If it was in the shops and you could take the delivery cost out, you could be looking at a sub £100 price tag. So overall it is worth splashing out for because it is going to last a lifetime.
Pros
● Comfortable to use;
● Easy to adjust with the quick release nuts; and
● Great storage capability when not in use.
Cons
● Limited expandability.
Links
● Wheel Stand Pro
● Saitek Pro Flight Yoke System Product Page
Summary and Rating
The Wheel Stand Pro (I keep wanting to call it the Flight Stand Pro) is matchless in its innovation, design and quality. If you have limited space, or want a free-standing set up, then this is the product to buy.
| Rating: |
 |
|
| ● Ease of setup: | 9.0/10 | |
| ● Performance against expectations: | 10/10 | |
| ● Build quality: | 10/10 | |
| ● Value for Money: | 9.0/10 | |
| ● Documentation (Including set up video) | 8.5/10 |
| Mutley's Hangar score of 9.3/10, "Outstanding" and a Mutley's Hangar Gold Award. |